Hardware Labs Black Ice Nemesis GTR 420/560 and Corsair ML140 Red 140mm PWM Magnetic Fan
on Odin
Motivation
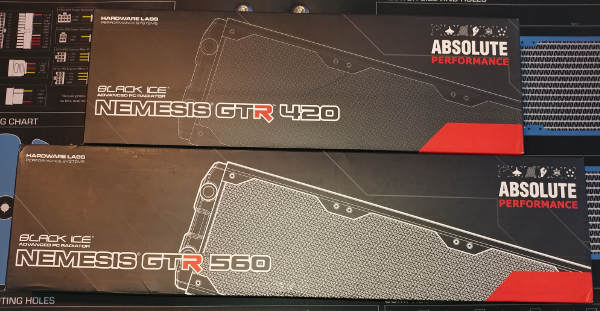
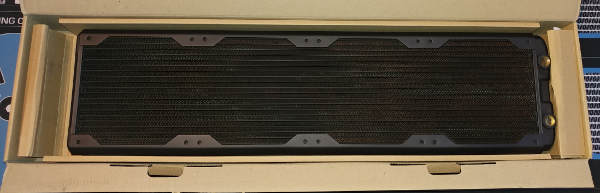
I’m going to do a Hardware Labs 560mm Black Ice® Nemesis® GTR Black Carbon Radiator on the top right and a Hardware Labs 420mm Black Ice® Nemesis® GTR Black Carbon Radiator with a Monsoon fillport on the top left.
I’ll be doing a push/pull configuration - but I’ll leave that to the post for the Fan installation.
Unboxing
While I have not checked the size of the PPCS screws yet, I will definitely be taking this warning seriously.
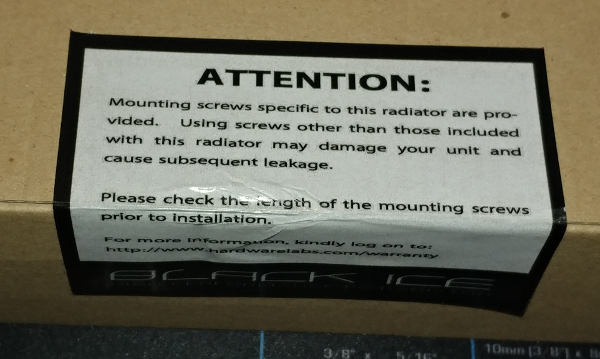
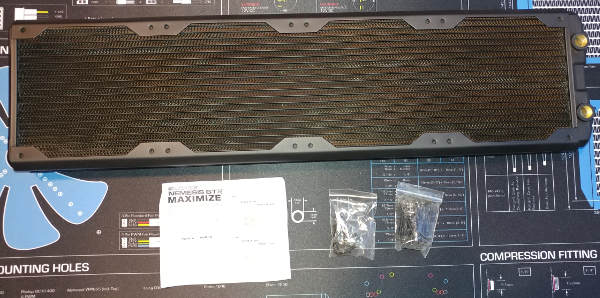
Not much frills with the packaging - but really, what do you need?
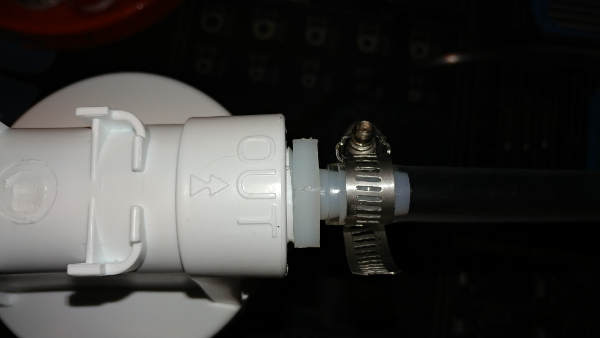
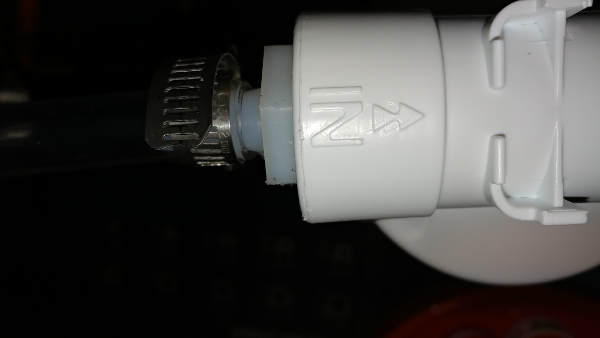
There are some short screws (8mm), long screws (43mm) and a manual. Probably the most important aspect of the manual is that it tells you which port to use for IN/OUT depending on the direction of the airflow.
Cleaning
With my last (first) watercooled machine, I did not clean my radiator first. Over the years, I have come to realize that this is something that one should do to clean out any soldering flux and machining oil that might still be left in the radiator. I had previously considered a modular radiator that had no solder; but it is probably good to get into the habit anyway.
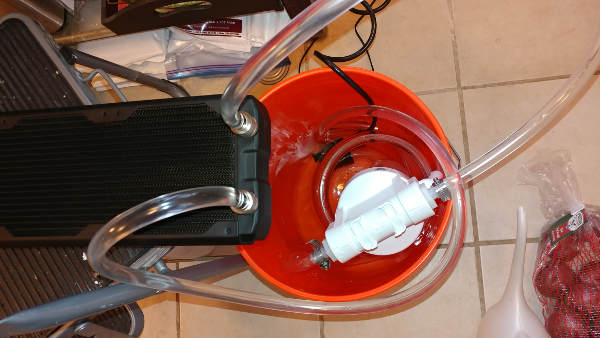
What’s the best way to go about it? A lot of people put water in it and slosh it around a bit. I wanted something a bit more thorough.
I found someone’s post that had a pretty nice setup. Unfortunately, that page no longer exist. I found this page that had the same general idea and used it as a rough guide.
Parts
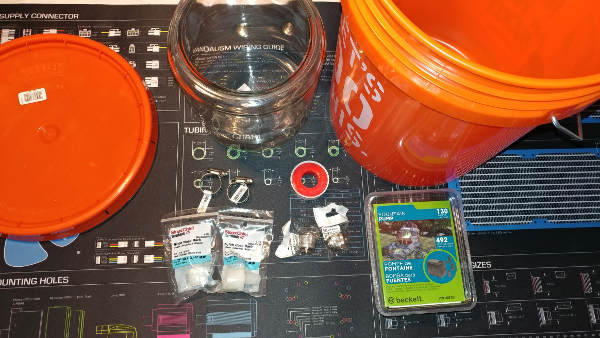
There is a 5 gallon bucket. I had gotten a lid as well, thinking I would close it to keep the cats out while cleaning; but in actuality the stuff inside was too tall to close and the cats left it alone anyway.
The glass jar from some thrift store was mostly to keep the filter (below) upright. When I did the second radiator, I found it was easier to hang it from the filter handle – though I kept it in the jar to keep it dry.
For connecting to the filter, a pair of Everbilt 1/2” ID x 3/4” MIP barbs. These were a pain to get. Home Depot was willing to ship my order, but not those. Another store was willing to ship those, but wanted to charge like $34 for shipping. In the end, I just drove over to Home Depot and picked them up myself.
I also grabbed a couple 1/2” to 1-1/4” hose clamps; but to be honest they probably weren’t necessary.
The plumbers tape was some I already had lying around.
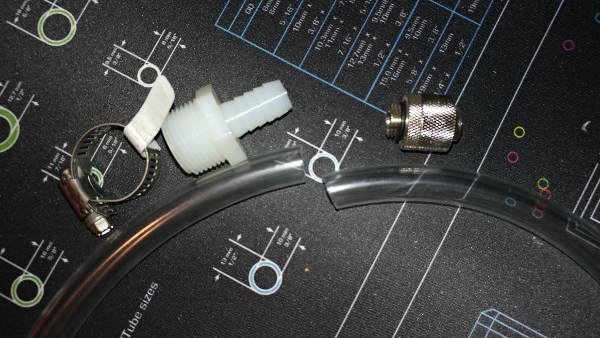
For connecting to the radiator, a pair of Phobya 16/13mm Compression Fitting Straight G1/4”. If I was going to do this again, I think I would do some Koolance quick disconnects instead because screwing in the fitting took some contortions.
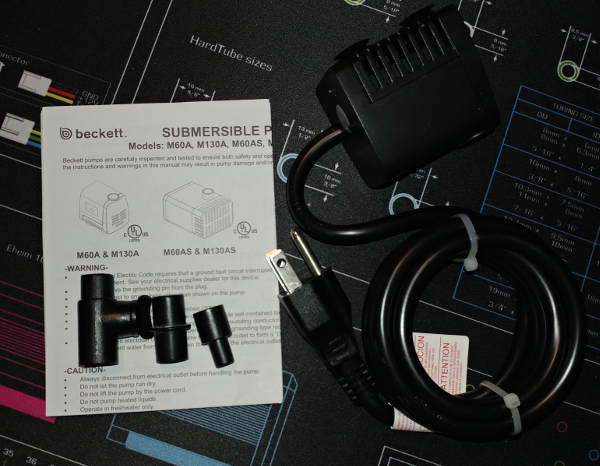
As recommended on that article, I grabbed the Beckett 130 GPH Submersible Fountain Pump and GE Clear Whole House System GXWH20S .
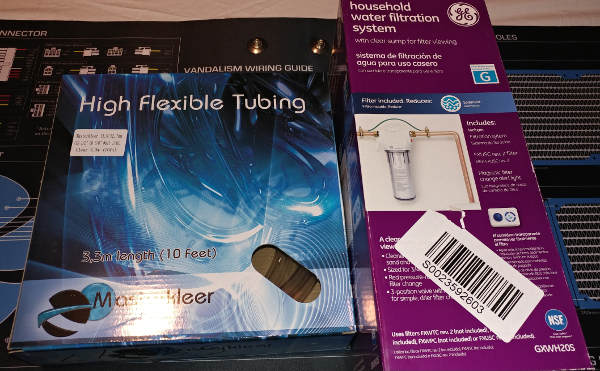
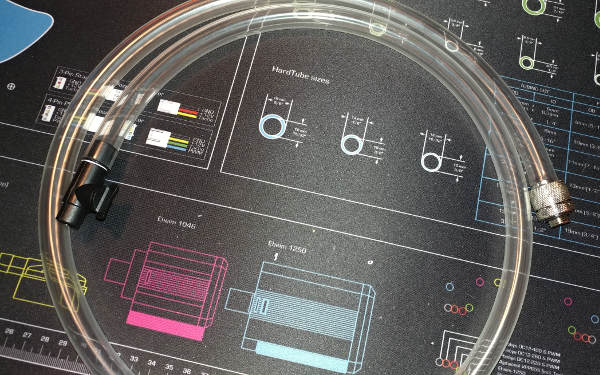
For tubing, I grabbed Masterkleer Hose PVC 1/2” ID x 5/8” OD Clear 3.3m (10ft). I ended up using most of it.
Unboxing
Inside the filter box, we don’t really need anything other than the filter itself. If you are going to reuse this much, the instructions show how to use the big tool to change the internal filter. We’re not going to use the mounting bracket or timer.
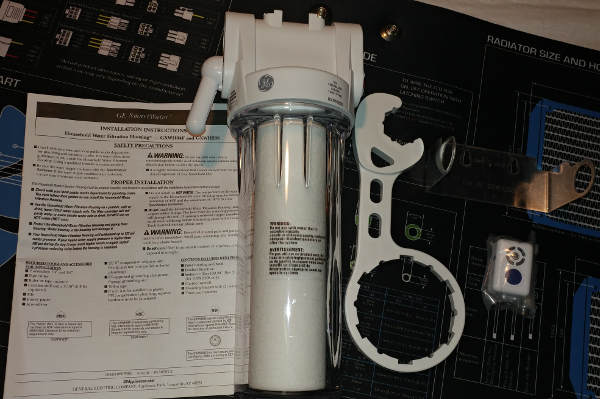
We will, however, use most of the pump parts.
Assembly
Filter -> Water Tank
We’ll start by attaching a MIP barb to the hose.
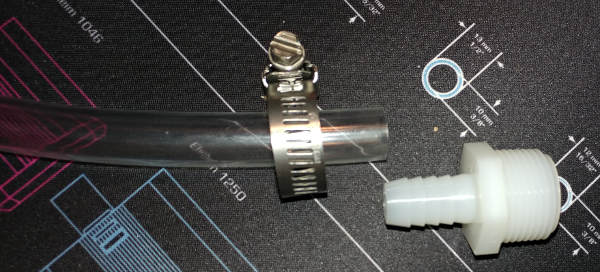
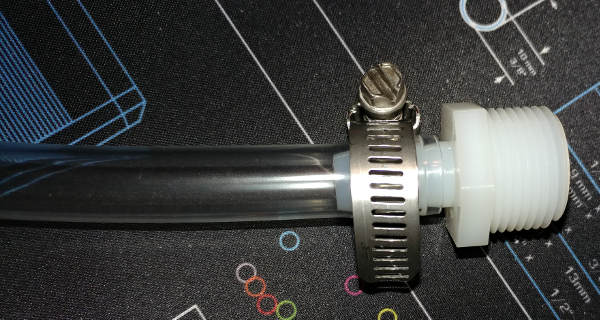
Make sure to use some plumbers tape when connecting the MIP ends to the filter.
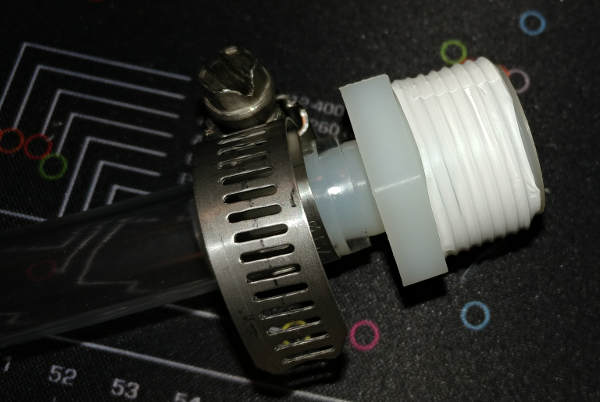
We’ll attach this to the filter OUT side.
The other end of this hose will lie in the bottom of the bucket.
Radiator -> Filter
We’ll be attaching the MIP barb at one end and the G1/4” on the other. As I said above, a quick disconnect would be much easier here, but I used a standard compression fitting.
We’ll attach this to the filter IN side.
The other end of this tube will connect to the radiator. Since I was not using quick disconnects, I had to rotate the radiator around in circles while screwing in the fitting.
Pump -> Radiator
I have to apologize up front. It appears I laid out the pump parts incorrectly here.
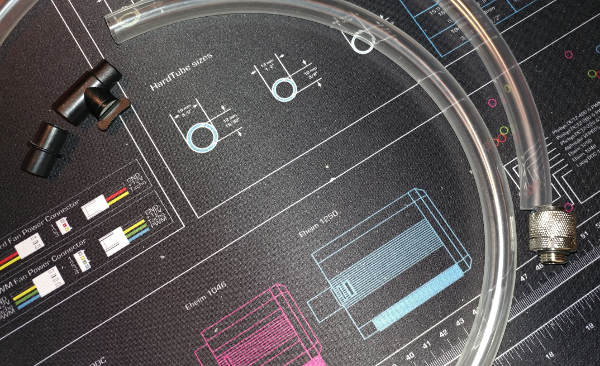
It will actually look like this:
Interestingly enough, even with plumbers tape (there is no threads), that connection between the two pump parts is pretty tenuous. What will actually happen is that you will put the flow control into the pump, then after hooking up the hose (assuming you aren’t doing the quick disconnect), you’ll push the other end down into it. The reverse is also true – when taking the radiator off the hose, you’ll just end up pulling it out of the pump so that you can rotate the entire hose.
In Progress
I ended up using about 2 gallons of distilled water. I let each radiator clean for about 90-120 minutes.
Gotchas
- The filter and jar will end up floating, which means that no matter how carefully you set it all up – unless you have it weighed down, it will rise up, tip over, etc. Mine didn’t tip over enough to let all the water in (not that it would have really mattered), but it was close.
- It was easier to hang the filter over the edge of the bucket using the Off/Filter/Bypass handle.
- If you aren’t careful, the hose will bend/compress.
- As stated earlier, quick disconnects would be easier than trying to screw in a hose that is pinned at the other end.
- Once you finish cleaning it, it’s not terribly easy to get all the water out and dry it.
Was it worth it? I think so. I am more confident that my radiators are clean and won’t corrupt my loop. Even if it would have been fine, that increased confidence is worth something.
Install
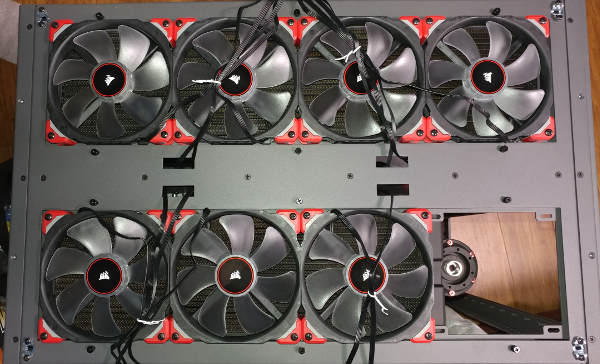
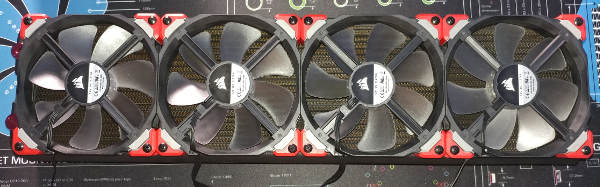
We’ll make a radiator sandwich with the mounting bracket.
| 560 From top-to-bottom |
| [ML140] [ML140] [ML140] [ML140] |
| [560 radiator mount] |
| [560mm GTR Radiator] |
| [ML140] [ML140] [ML140] [ML140] |
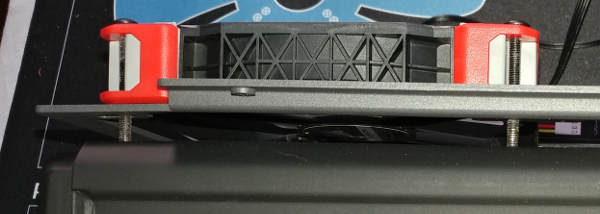
The mounting bracket gets mounted from below and screwed in from the top.
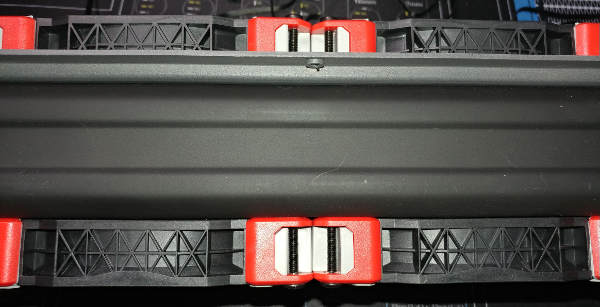
The 420 setup is almost identical, except that we are using a shorter radiator (and thus 2 less fans). In their place will be the Monsoon fill port.
| 420 From top-to-bottom |
| [ML140] [ML140] [ML140] [MMRS-FDP-RC-RD] |
| [560 radiator mount] |
| [420mm GTR Radiator] |
| [ML140] [ML140] [ML140] [MMRS-FDP-RCS-RD] |
Screws
Remember our warning?
Turns out I should have ignored it.
Reviews had said that it came with screws of the perfect length for 25mm fan install.
The warning itself seemed to indicate that it would be the correct screws for the “normal” fan installs.
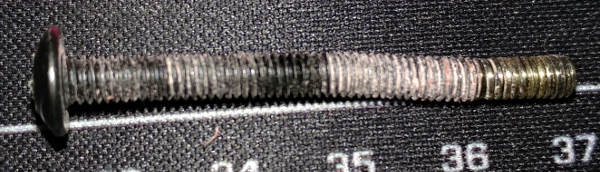
I heard a little bit of crunching and thought, “that doesn’t sound good”. The screws still had a good 15-20mm to go.
I took everything off and took a look.
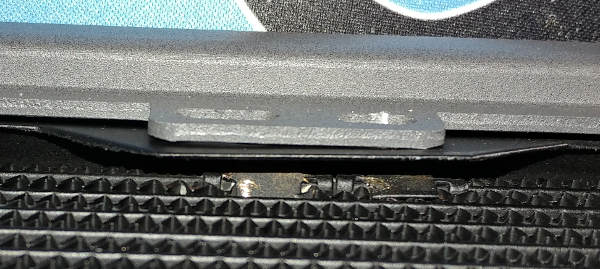
Looking at this damage, I was trying to ascertain what was going on.
One possibility was that their screw shields would have prevented the provided screws from working. Possible, but seemed unlikely.
Another possibility was that these were meant to bend over as a way to indicate that the radiator had been used (like a warranty void sticker). That seemed unlikely, but I have never bought Hardware Labs parts before.
I decided to try trusting that the manufacturer knew what they were doing.
At some point you just can’t convince yourself you are on the right path any longer.
Even if I were to run this through a water test right now, I have a feeling it would leak under extreme use (number crunching, MMO, etc). I can’t risk that.
I decided to replace the radiator - even though this one is brand new and unused. I didn’t bother trying to RMA it because I doubt following their directions excuses me for breaking it myself.
So what to do about the screws? Performance PCs gives you a choice of additional screws when you buy it - but it is only the same two original lengths. 8mm or 43mm. Neither of those are actually appropriate for installing 25mm fans (like the Corsair ML140). If you do use them to install the Corsair, and stop at the screw plate, the CaseLabs top plate will not go on because of the extra 15-20mm in height.
It turns out that Performance PCs does carry some Hardware Labs Black Ice Mount Screws M4 x 28mm. I ordered a ton of these and decided to try them instead of the ones provided, ignoring the warning.
I emailed Hardware Labs, suggesting that they update the warning label to reflect the intended size of fan.
I also sent a message to Performance PCs suggesting that these screws be listed as an option when you buy the radiator. Maybe more people would buy the correct screws if they were listed as one of the options.
For the bottom of the radiator, the 28mm screws worked well.
The top was not so lucky. The 28mm screws could not reach the radiator through both the fan and the mounting plate.
Could I have been wrong? Was the 43mm correct?
I don’t think so. So, once again I decide to order more screws. I couldn’t find what I needed at Hardware Labs website or Performance PCs. Checked Home Depot and Lowes. Checked Ace Hardware. I was going to try Fastenal, but they weren’t open on weekends. I ended up order some screws from MonsterBolts on Amazon. Wait another week.

When I was a kid, we had walls full of screws and bolts in various sizes. As an adult, I have not been able to spare the space for that - but maybe I should reconsider.
Assembled
As you can see, using M4x28 on bottom and M4x30 on top worked much better than the 8mm or 43mm that came with the radiator… so much for the warning sticker.
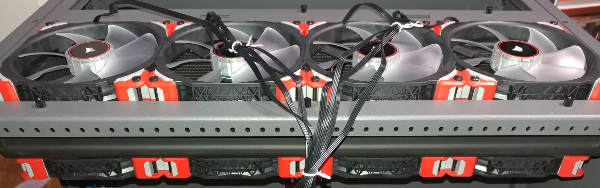
When assembling, make sure to pay attention to which direction the radiator will lie and that the cables will go towards the center of the chassis. I messed up mounting the fans on the 420 and had to remove them all and start over.
Installed
The cables are just lying loose here. I’ll attach them during the Phobya splitter install.
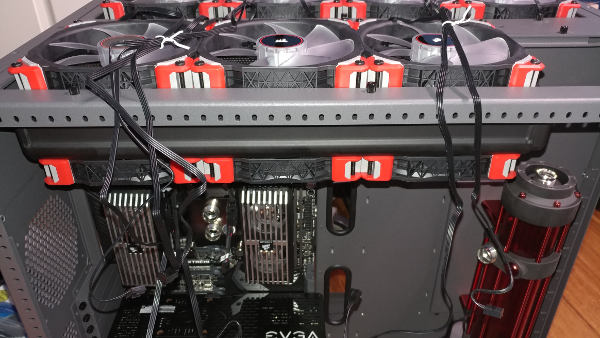
As I mentioned earlier, we are leaving one space open above the reservoir to add a fill port. It should be noted that the radiator is sticking into that space a little bit, so that plate needs installed before going too crazy with the tubing.