Making a Case Badge
on Odin
Goal Permalink
When building a new computer, I would normally include a couple of the case badges that came with the parts. It might have been an AMD sticker, or TUF Inside, or maybe NVidia.
This time I wanted to do something a little more custom. While the theme is a bit askew (bought the parts before choosing the build name), I could at least make the case badge reflect the name.
Process Permalink
I had decided I wanted a case badge, but that was about the extent of it. I had not decided if it would be a logo, a word, or something completely different. I wasn’t even sure if I was going to mount it on the front of the case or maybe on the window itself.
Acquiring a Model Permalink
I started perusing sites for images that might represent Odin. While there were many images (Valknut, Odin’s Horn, Huginn and Muninn, Geri and Freki, Slepnir, etc) it occurred to me that the best I could do with any of them was emboss them.
I needed to restart my search with 3d models in mind.
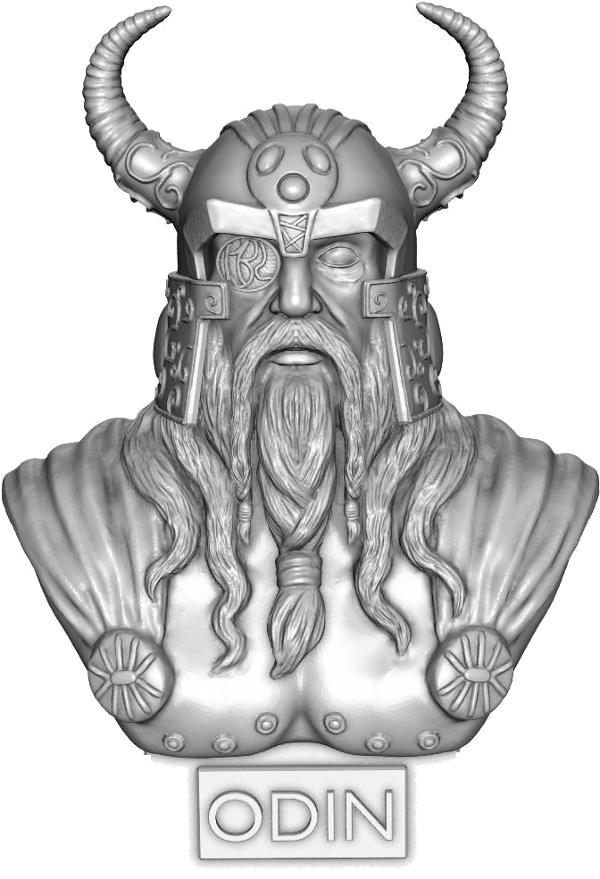
I eventually purchased this model from cgtrader:
That ended up being a 50mb STL file.
For my plan to work, I’d need to cut it in half vertically (cut off the back, making it flat) and put some holes in it for the bolts.
Slicing the Model Permalink
I read a lot of online reviews trying to determine which software to use for this. I was hoping for something pretty straightforward. Many of the links I found recommended NetFabb Basic (which no longer seems to exist – the cheapest one is definitely not worth the cost for just making this badge), or Tinkercad. I went through the Tinkercad tutorials only to find out at the end that the max STL size was 25mb.
In the end, I found that Blender works the best – if you are not using a HiDpi monitor. On my 4k laptop, I couldn’t use it; but on a standard monitor it was great.
I sliced the back off the model, bore two holes through for the screws and bore partial holes through so they could sit a little recessed. I also resized it to fit properly.
Blender Tips Permalink
Add the 3d Print Toolbox
File|User Preferences -> Add-ons -> 3d Print Toolbox
Change to mm units
For a particular model/scene:
- On the bottom right menu
Scene -> Units -> Unit Presets -> Millimeters- Note the unit scale is now: 0.001
Nor the almost-Right menu, with an object (right mouse) selectedDisplay -> Scale -> 0.001(changes the grid to match)- Note near the top,
XYZ Euler -> Dimensions- that’s the size of the selected object in mm now
Axis
RGB = XYZ; IE Red=X, Green=Y, Blue=Z
Printing the Model Permalink
I have a FLUX 3d printer here (still NIB) but since I have not yet set anything up, I decided to try Shapeways.
Attempt 1 Permalink
The first attempt was using the Polished Grey Steel. I thought that would look really nice with my case. I had never used Shapeways before, so submitted the order before I realized they were doing automated checks.
What went wrong:

Our automated checks can only account for certain aspects. We have discovered the following issue(s) during our manual 3D printability checks.

    Printability issue: Weak Geometry
    Description: The model is too thin to print. Increase wall thickness to at least 0.08" / 2.0mm in all areas. For more info on design tips and guidelines, visit http://www.shapeways.com/materials/steel-design-guidelines

Find additional information in the attached image.

Model's current printability success rate: 0%
Now, the ideal fix would be for me to learn a lot more about 3d printing and fix the weak geometry. Maybe I will, eventually.
For now…
Attempt 2 Permalink
The second attempt I used Black HP Nylon, which showed as having passed all the automated checks.
What went wrong:

Our automated checks can only account for certain aspects. We have discovered the following issue(s) during our manual 3D printability checks.

    Printability issue: Thin Walls
    Description: The areas noted in the attached picture are too thin to withstand our manufacturing process without breaking.

    The highlighted areas are at risk of breaking as the structure is too thin to withstand the weight of the loose support powder around them, or the pressure needed to clean your product. The design may be more successful if the weak areas are thickened.

    We encourage you to alter your design to ensure a successful print. We will then review your model manually upon ordering based on these guidelines:

    Please consider:

    1. Thickening the walls or wires to meet our guidelines where you have the ability to do so.

    2. Reordering this model in the current material with "Print It Anyway" selected, in case you’re ordering the model for yourself. More information on this feature can be found here: http://shpws.me/PeIZ

    The Material guidelines can be found here: http://shpws.me/Puy7.
    To learn about 3D model printability checks please follow http://shpws.me/MdWT.

    Regards,
    The Shapeways HP Nylon Team
This time, they gave me an option of trying to print it anyway. As such, I told them to go ahead and print it while starting a third attempt.
Update: It looked pretty good but one of the horns was broken off.
Attempt 3 Permalink
The third attempt I used Frosted Acrylic Extreme Detail. This had also passed the automated checks, and had the best chance of success. I was less excited about this one because it was clear, but thought maybe I could paint it.
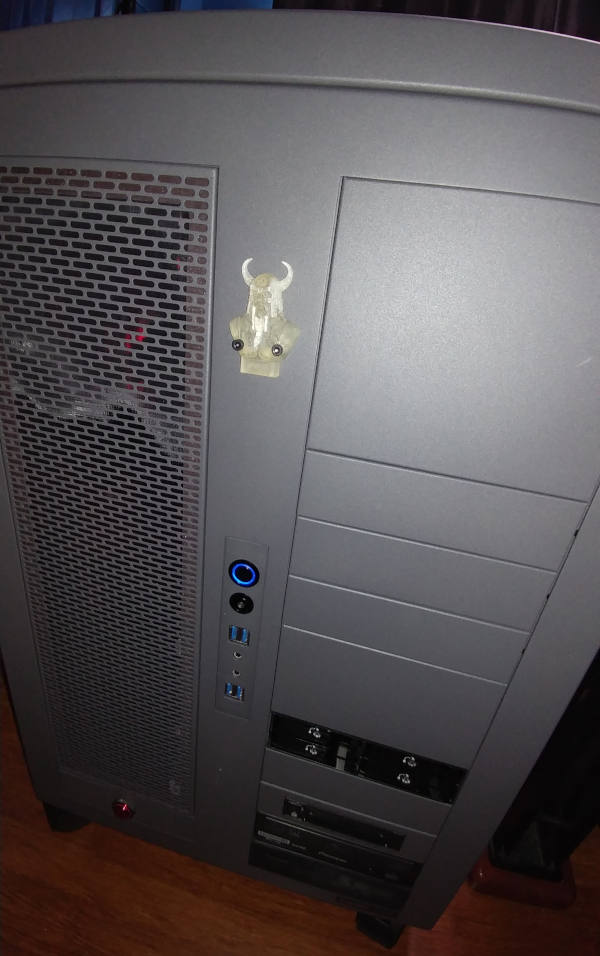
As it turns out, that one printed OK.
While I may paint it down the road, or fix the model and try a different material – I went ahead and mounted it for now.


