frame.work: First Impressions
on frame.work
- Motivation
- Ordering Process and Timeline
- Unboxing
- Build
- Close Up
- What about the …
- Seriously, why those modules?
- First boot
- First week…
- What’s Next?
- Update 18Aug2021
Motivation
My existing laptop was pretty nice. One of the original Dell Precision m3800 CTO Edition Ubuntu laptops. It has an nVidia Quadro K1100M, 500gb ssd, 16gb ram and 802.11ac. It ran on an Intel i7-4712HQ (8) @ 2.3 GHz and has a 3840x2160 touchscreen. I bought it in 2015.
Two years later, the video died. I contacted Dell. They said I could take it to BestBuy for warranty repair (even though I bought it directly from Dell). BestBuy told me that they didn’t even know what kind of screws used and could not open it.
Every once in awhile it will work for a short period of time, then it shuts down for a good week or so.
As such, I have been avoiding turning it on. I have been planning on opening it up and trying to repair it myself (maybe redo some thermal paste or swap out some component)… however, being unsure whether I could repair it without breaking it… I have been postponing it.
Along comes frame.work. Not only do they encourage you to open the laptop and repair it yourself - but they have a “DIY edition” which requires you to do some minimal assembly before even using it.
Sounds good to me!
Ordering Process and Timeline
On 13 May 2021, I pre-ordered as part of Batch 1 for $100 down. While waiting, they were blogging about the device about once a week.
We’ll get into the why of the components shortly, but the parts were:
- CPU: Intel® Core™ i5-1135G7
- Memory: 64GB (2 x 32GB) DDR4-3200
- Storage: 500GB - WD_BLACK™ SN850 NVMe™
- WiFi: Intel® Wi-Fi 6E AX210 No vPro®
- Bezel: Black
- Keyboard: US English
- 2 USB-C
- 2 USB-A
- 1 DP
- 1 HDMI
- 1 MicroSD
- 3 Storage – 250GB
- Framework Screwdriver
- Power Adapter - US/Canada
- (no OS - DIY Edition)
On 27 July 2021, they sent me a confirmation message stating that they would charge the remaining $1500 in the next couple days.
On 29 July 2021, another email from them saying that they had successfully charged the remaining balance and that the order would ship soon.
On 31 July 2021, confirmation that it had shipped and provided a tracking number.
On 8 August 2021, FedEx delivered the package.
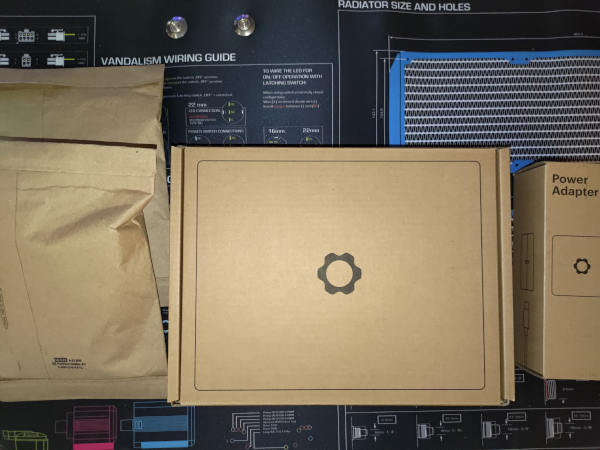
Unboxing
Inside the main delivered box were 1 laptop box, 1 power supply box and two accessories bags.
The laptop box contains the screwdriver/spudger tool and instruction book underneath the laptop.
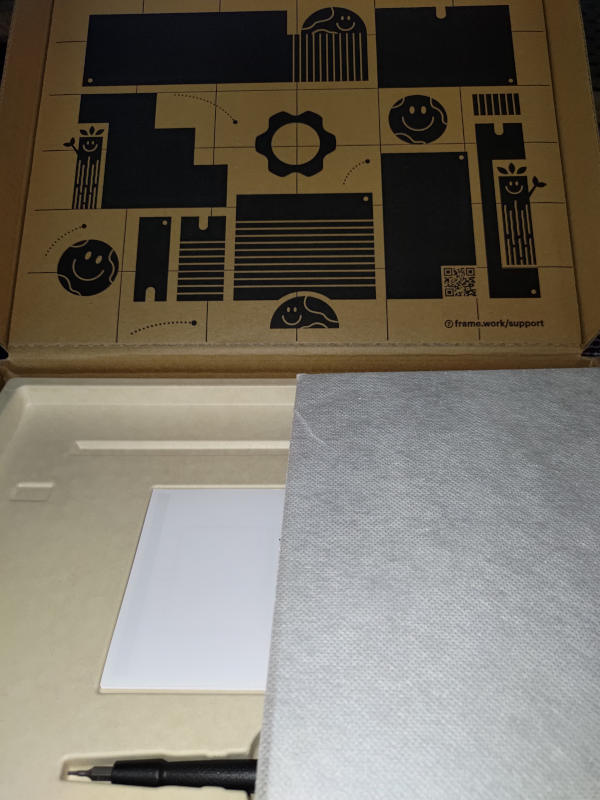
This screwdriver is the only tool you need to repair your laptop.
It should be noted that later instructions from the Framework Support team encourage you to use the soft laptop cover as a surface when you open up the laptop to prevent scratches.
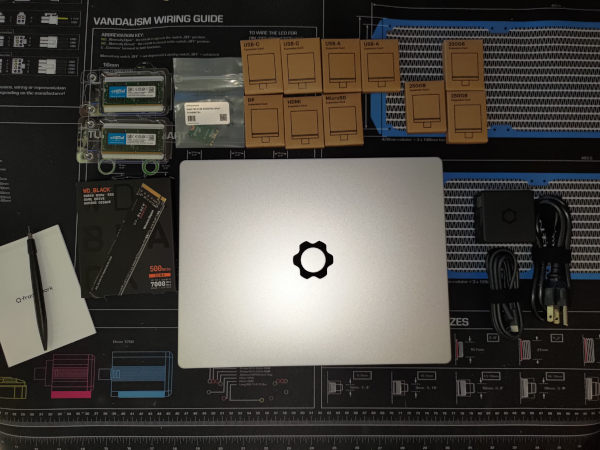
With all of the DIY Edition components laid out. (Yes, we will get to the why on some of those modules)
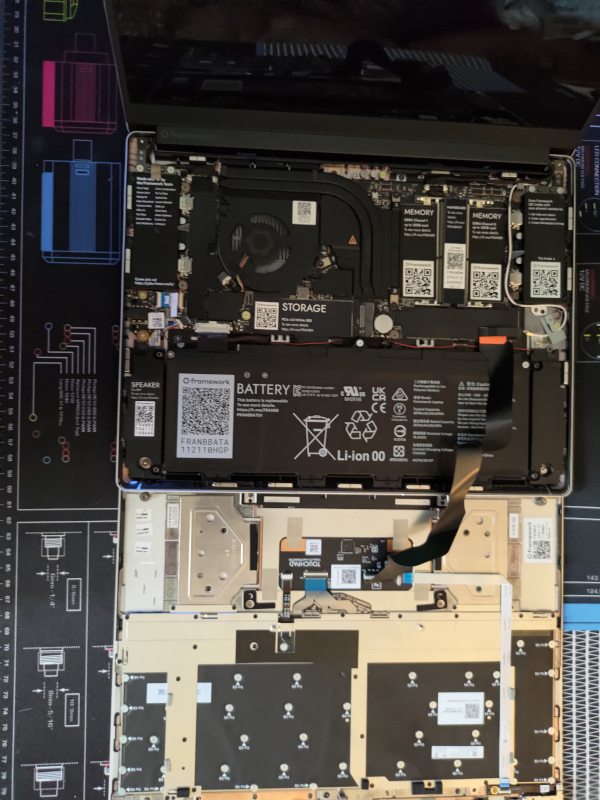
And with the laptop opened up.
Build
I unfortunately forgot to take any photos while adding components. I might have to go back and do that retroactively. In the meantime, here are some notes from the experience.
Make sure the power is off and modules are removed before altering the build.
Before you start, scan the QR code inside the module jack.
Case Screws
There are 5 captive case screws to loosen (not remove) in order to open the case.
It should be noted that while looking at the bottom of the case, the one on the bottom left corner will not lift as freely as the rest. This is intentional to make it easier to get the laptop open.
Removing the Keyboard
Once the case screws are removed, the keyboard is held on magnetically.
Flip the laptop over and open the screen like you were going to use it.
Use the spudger tool to lift the bottom right corner (which is that case screw we talked about once you flipped the laptop over). Carefully lift around the edge. If there is too much resistance, make sure you loosened the 5 case screws.
When you lift the keyboard, be careful that it is still attached by a cable. I have seen some YouTubers lean the keyboard against the screen (which does seem easier), but the Framework Support team keeps suggesting flipping it the other direction in their instructions. See my photo above as an example.
If you need to remove the keyboard entirely, there is one cable with a finger-pull to remove it. For the initial install you do not need to do that.
QR Codes
There are QR Codes everywhere. The first one can be seen inside the module jack before you even open the case. Once inside the case, every part is labeled.
I think these will become much more useful once the marketplace opens up. For the initial build, I only used the QR code accessible from the outside of the case.
Memory
The memory slots in and has a retention clip on both ends You’ll notice that one memory stick faces up and the other down. Just make sure the retention clips fasten down.
NVME
The NVME is a standard M.2 2280 socket. This is one location where the screw is not retained so be careful not to drop it.
WiFi
This is the one component that is not friendly.
Remove the retaining clip.
There are two small antennae that you have to clip on. Luckily, the board is color coded to the cables. Once they are on, they do have a tendency to come off if you aren’t careful.
You also need to re-route the wiring (see the installation instructions for details), then put the retaining clip back on.
Of all the reviews I have watched; and my own experience – this is the one piece that could use some improvement.
Close Up
Lay the keyboard back on and the magnets should align it.
Close the screen.
Turn over and screw in the case screws.
Pick your modules and insert them! (make sure to include at least one USB-C for power)
What about the …
The motherboard, fan, power supply, speaker, etc can all be replaced as well. Originally the DIY Edition was going to come with them uninstalled; but that changed to reduce the shipping costs. They posted a blog showing how to remove everything.
Seriously, why those modules?
So I am sure some of those reading this are wondering why I chose this set of modules:
- 2 USB-C
- 2 USB-A
- 1 DP
- 1 HDMI
- 1 MicroSD
- 3 Storage – 250GB
Especially since there are only 4 jacks?
Let’s work through it.
- 1 USB-C will be needed to power/charge the device
- 1 DP, 1 HDMI, 1 MicroSD will likely rarely be used - but in case I need them, I have them.
- 1 USB-A so I can plug in all the random USB dongles, cables, drives, hardware that I have
- Why the second USB-A? I thought I might want mouse/keyboard at some point, or to copy from one USB drive to another…
- And the other USB-C? Well, most things I have are USB-C, but the other plug is taken up by the power.
Let’s look at the storage.
I decided to NOT make the nvme bootable. Yes, I know the nvme is a lot faster than the USB drives; but… I wanted to be able to cold-swap OSes without dealing with multiboot grub/etc.
So, one 250gb is Ubuntu. Another one will be Arch. Another might be Windows or Kali or something.
First boot
To do the first boot, I chose the following modules:
- USB-A (with Ventoy on USB)
- USB-C (not in use)
- USB-C (for power)
- 250 gb (for Ubuntu install)
When attempting to boot, there was a message that there was no OS. Makes sense, but why didn’t it detekt the OS on the bootable USB?
Secure Boot
During boot, tap [F2] repeatedly to get into the BIOS.
On the Security tab, disable Secure Boot.
It should be noted that it is likely possible to get it to work with Secure Boot - however, it wanted me to mark every UEFI install on the Ventoy partition as trusted for execution. I don’t want to go into the BIOS every time I drop an ISO on there.
After disabling Secure Boot, Ventoy Started up.
Ubuntu install
Usually, I prefer ZFS. I used it on Solaris, FreeBSD and Ubuntu. I currently use it on my work laptop and my home desktop.
However, in this case this only has 4 cores and we are running off of the USB. I decided to not use ZFS for this go.
/dev/nvme0n1showed up as the 500gb nvme. I’ll be saving that until after install.sdashowed as the 250gb USB Disk 3.2 that we will install to.sdbshowed as my 62gb Kingston Elite G2 hosting Ventoy.
After getting Ubuntu installed on sda, I used the Disks utility to format and mount the
nvme. I was originally going to do it manually but was feeling lazy late at night.
I’ll be using the nvme to host work / git repos. When I switch between Ubuntu / Arch / etc, I won’t have to redownload all those repos. In addition, all the builds will still happen with the speed of the nvme - even though the OS itself is on the USB.
neofetch
└─(21:36:08)──> neofetch                                                                                   ──(Mon,Aug16)─┘
            .-/+oossssoo+/-.               malachi@dwemer
        `:+ssssssssssssssssss+:`           --------------
      -+ssssssssssssssssssyyssss+-         OS: Ubuntu 21.04 x86_64
    .ossssssssssssssssssdMMMNysssso.       Host: Laptop A3
   /ssssssssssshdmmNNmmyNMMMMhssssss/      Kernel: 5.11.0-31-generic
  +ssssssssshmydMMMMMMMNddddyssssssss+     Uptime: 2 hours, 3 mins
 /sssssssshNMMMyhhyyyyhmNMMMNhssssssss/    Packages: 1923 (dpkg), 11 (snap)
.ssssssssdMMMNhsssssssssshNMMMdssssssss.   Shell: zsh 5.8
+sssshhhyNMMNyssssssssssssyNMMMysssssss+   Resolution: 2256x1504
ossyNMMMNyMMhsssssssssssssshmmmhssssssso   DE: GNOME 3.38.4
ossyNMMMNyMMhsssssssssssssshmmmhssssssso   WM: Mutter
+sssshhhyNMMNyssssssssssssyNMMMysssssss+   WM Theme: Adwaita
.ssssssssdMMMNhsssssssssshNMMMdssssssss.   Theme: Yaru-dark [GTK2/3]
 /sssssssshNMMMyhhyyyyhdNMMMNhssssssss/    Icons: Yaru [GTK2/3]
  +sssssssssdmydMMMMMMMMddddyssssssss+     Terminal: gnome-terminal
   /ssssssssssshdmNNNNmyNMMMMhssssss/      CPU: 11th Gen Intel i5-1135G7 (8) @ 4.200GHz
    .ossssssssssssssssssdMMMNysssso.       GPU: Intel TigerLake GT2 [Iris Xe Graphics]
      -+sssssssssssssssssyyyssss+-         Memory: 5192MiB / 64101MiB
        `:+ssssssssssssssssss+:`
            .-/+oossssoo+/-.
First week…
I’ve been using it for about a week now. Overall I really like it, and especially like the idea behind it.
The screen is much smaller than I am used to, but I was able to cope with that a bit better by changing Chrome and Firefox to 80% scaling.
Sometimes the trackpad doesn’t seem to register the clicks. The Framework team is looking into that.
I’ve already done my first “repair”. It was just adding a little double sided tape (as recommended by Framework) to help ensure the keyboard cable stays in place. Point is though, I have already opened the case up twice in the first week.
Performance is pretty good. I wouldn’t normally choose to buy Intel products if I had any choice in the matter. Hopefully they make an AMD mainboard and I can swap that out. It has a lot less cores and memory than my desktop - but 64gb is pretty respectable for a laptop. I have been playing with local kubernetes (via microk8s) and it’s been handling that fine.
It runs a bit hotter than I would like. It’s hovering around 40℃ (104℉, though it was getting up to 122℉ ). I ripped open my Targus lapdesk and am going to try swapping the tiny fans with some Noctua to see if that helps a bit.
The keyboard feels pretty nice. Once I realized that [Fn+Space] would turn on the backlight, it became a bit nicer experience since I usually am using it in the dark. The arrow keys are taking a little effort to get used to, and I miss having a 10-key… but it feels nice.
The trackpad works pretty well most of the time. Sometimes the clicks just don’t register.
What’s Next?
Next up will be installing some additional OSes on the other 250gb drives and finding a good small case for carrying the modules around so they aren’t loose in the backpack.
Update 18Aug2021
I swapped out the tiny fans in the Targus laptop as mentioned above with a pair of Noctua NF-A12x25 5V. The machine is running much cooler. It’s running about 27℃ (82℉ ) now.


