CaseLabs Bottom Accessory Mounts
on Odin
Motivation
In my original post, I assembly the CaseLabs MAGNUM THW10 using the default parts that came with it.
Specifically, the bottom chasis section had a thin aluminum plate on the floor of each side.
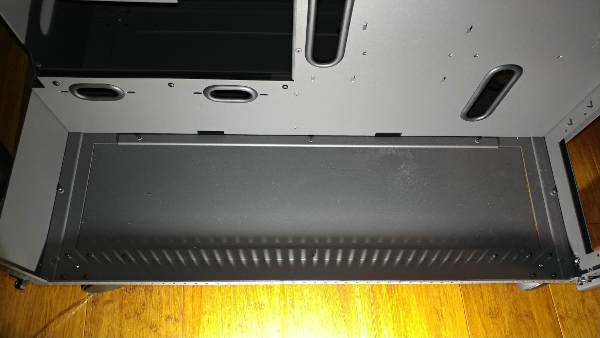
Currently, I am planning on mounting my pump there - but I would also like to consider later modifications. I would like to simplify the effort of that modification. If I want to add a fan, mount some control, whatever - I don’t want to remove the pump and entire bottom plate in order to do so.
I want to make the bottom mounting plate more modular.
Unpacking
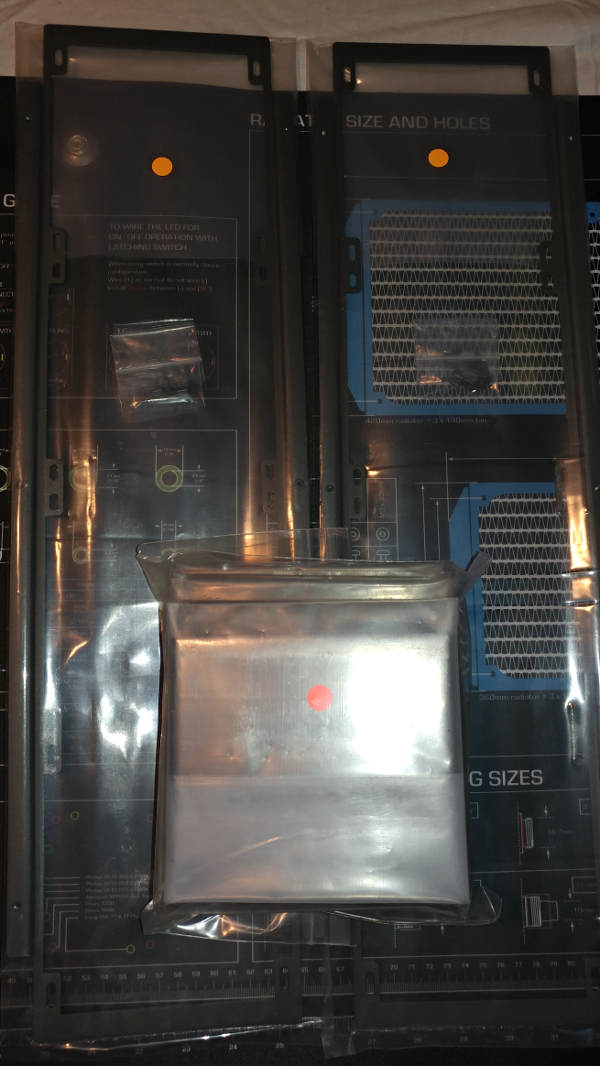
You should be aware that ordering these parts has a slight lead time. It’s not as long as the case was initially – but it took almost a month to get them.
Radiator Mounts
I purchased two additional 560 radiator mounts.
Stacking the old plate and the new mount (slight offset so you can see the alignment), you can see that the new mount is slightly longer (about 20mm) than the original plate.

Bottom Accessory Mounts
I also purchased eight additional 140.1 Bottom Accessory Mounts. Realistically, I think I had a couple already, but rather than risk an additional month if one part was the wrong size, I just ordered 8 identical parts.
Each mount comes with its own screws.

Installation
Accidental Discovery
Before examining how the mounting bracket actually works, I was noticing that the mounts can fit in either direction.
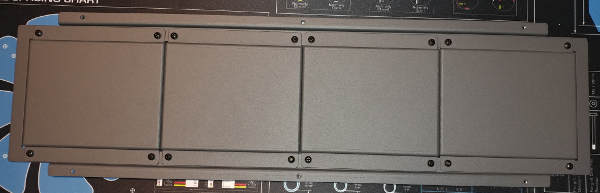
When mounted like this, they just sit on the mount (not fastened down). Not useful for what I want to do – but if someone needed a mount that could just slide back and forth and be freely removed for some reason; it might be worth investigating.
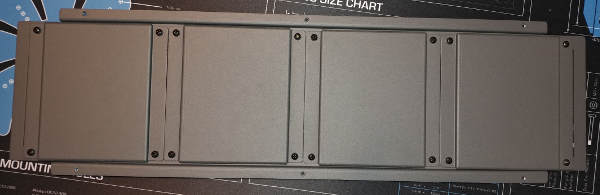
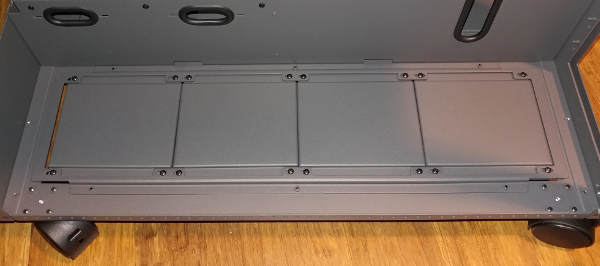
Assembled
It took me a moment to figure out the correct way to line everything up.
I had pre-installed all the mounting plates (as above) then realized I had done it wrong and had to start over.
The jist of it is (assuming you did not pre-install, or you are modifying it after the fact):
- With the mounting bracket protuding upwards, place it on top of the hole.
- Use the provided thumb screws from below the case to tighten the mounting bracket down. If you can still lie your case on the side, it would be worth it.
- Drop the screws for an accessory mount into the four holes around where you are attaching the plate.
- Push the plate up from below the case, while tightening the screws from the top.
You’ll notice there is a little bit of air space uncovered. You can slide the plates a little, but you will need to decide which area is uncovered.
When I go to install the pump, I will have to do steps 3-4 in reverse, attach the pump, hope the pump fits under the case, then do steps 3-4 again.


